

How to move your Vimeo library to an external hard drive
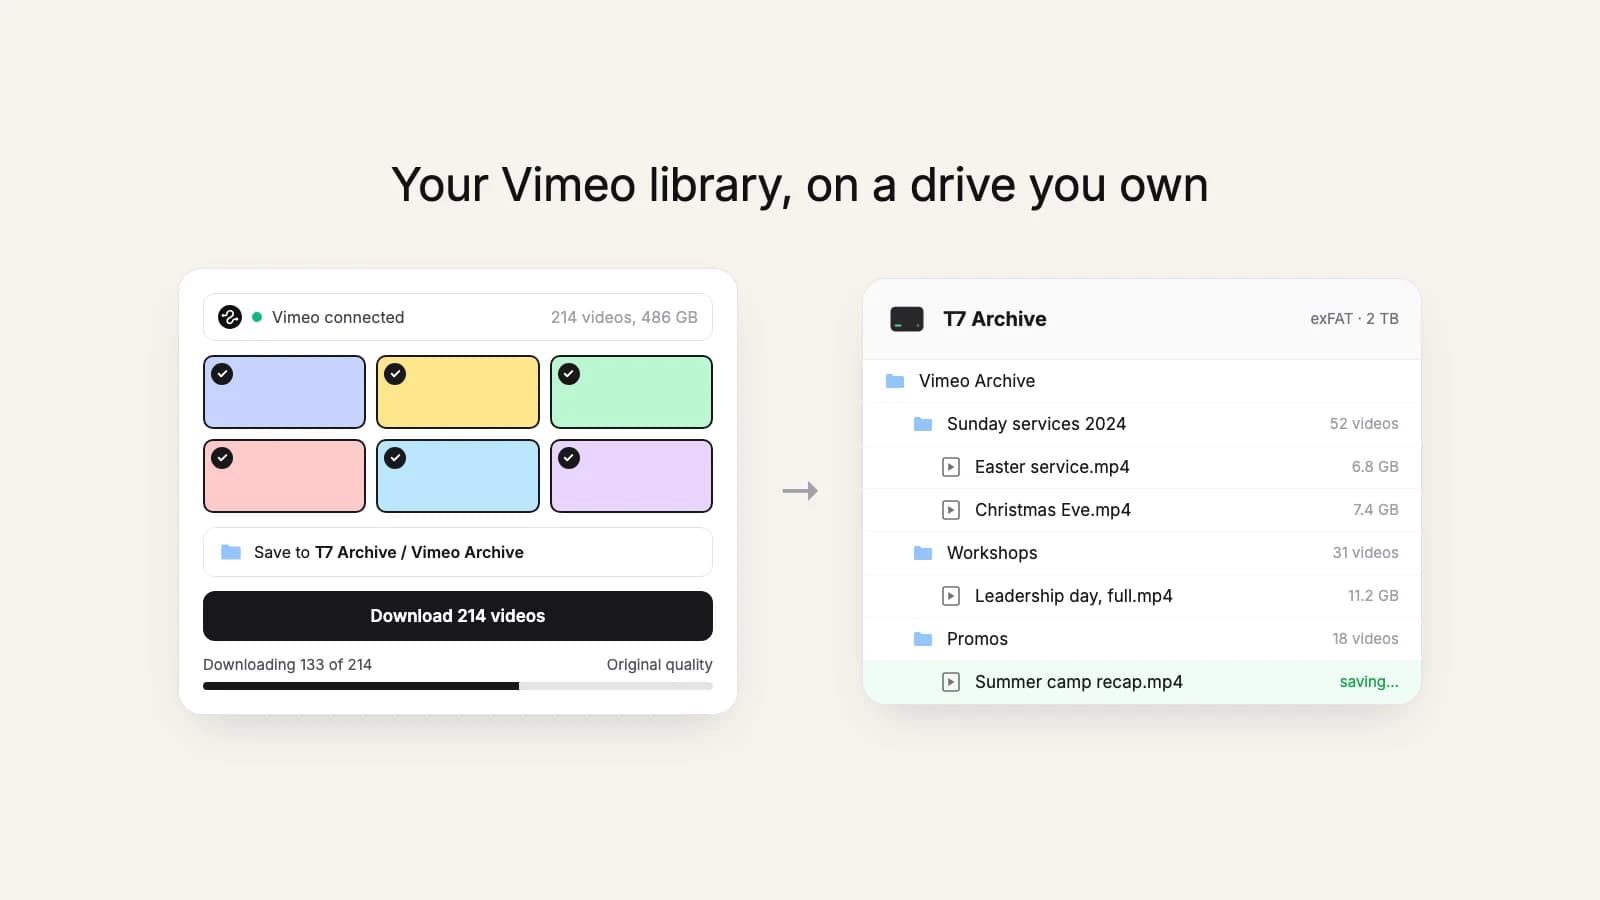
An external hard drive is the cheapest place to keep a video library you don't want to lose. You pay once, there's no monthly fee, and nobody can restrict it when a plan changes. Here's how to get your whole Vimeo library onto one, with your folders intact, without downloading each video by hand.
1. Work out how much space you need
Start with the total size of your library. Once you connect your Vimeo account in our download tool, it shows the number of videos and the total size at the top. Buy or free up a drive with comfortable room to spare: original files are the largest version of each video, and you'll want space for next year's uploads too.
2. Check the drive's format (this one catches people out)
Many drives come formatted as FAT32, which can't store any single file larger than 4 GB. An hour-long recording at original quality is often bigger than that, and the copy will fail on exactly your longest, most important videos.
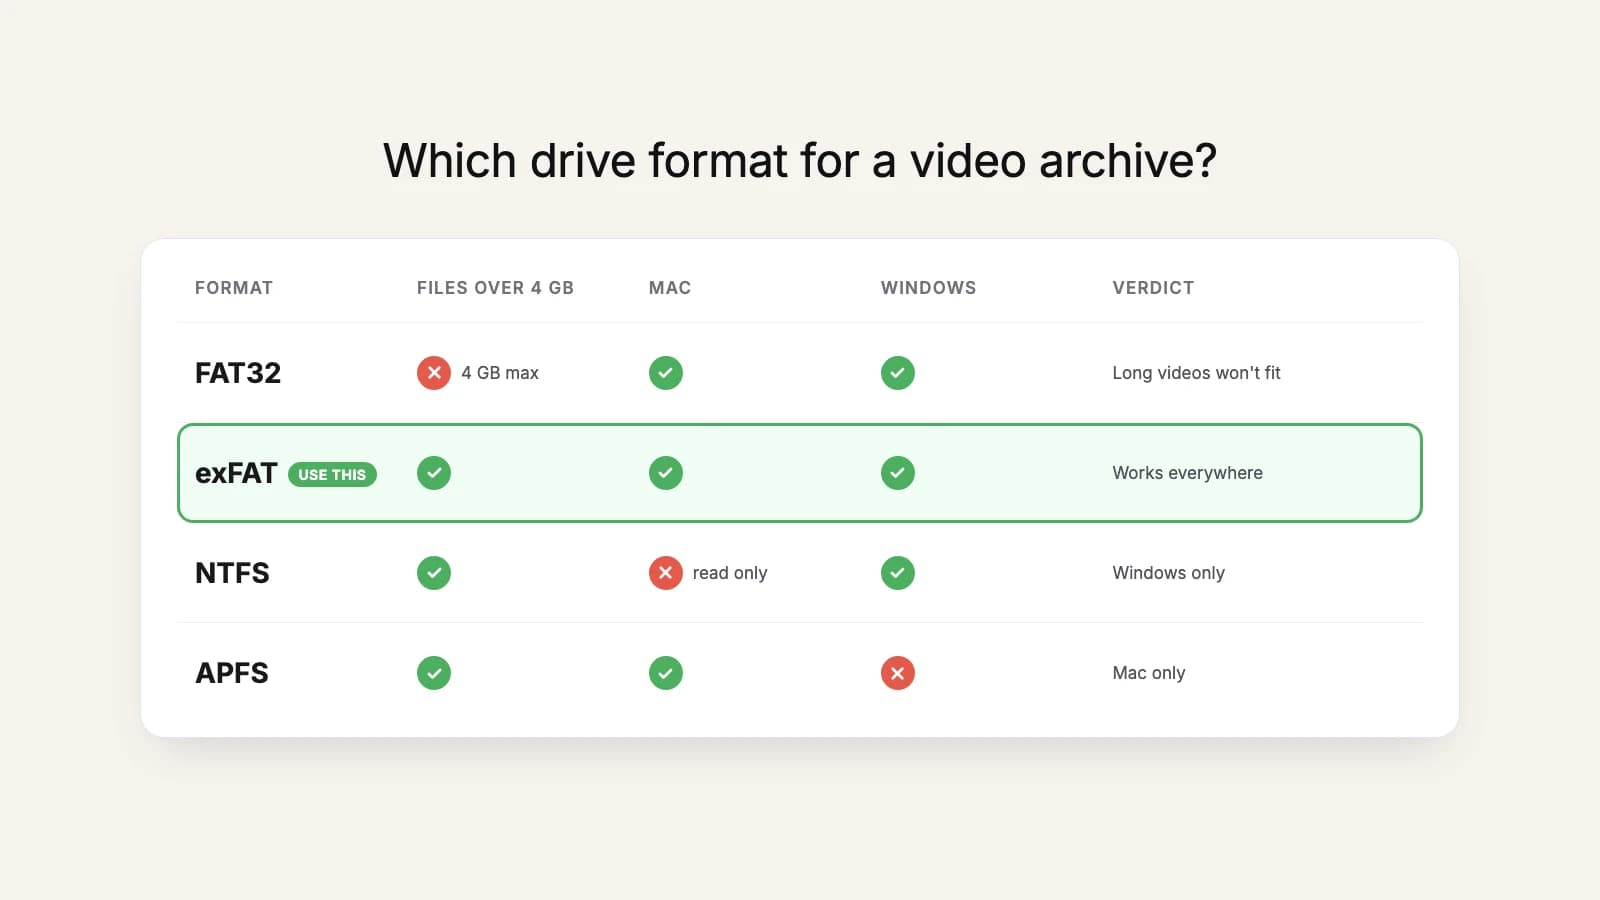
- exFAT: large files, reads and writes on both Mac and Windows. The safe choice for an archive drive.
- NTFS: fine on Windows, but a Mac can only read it out of the box.
- APFS (or Mac OS Extended): fine if the drive will only ever be used with Macs.
You can see the format in Disk Utility on a Mac or in the drive's Properties on Windows. Reformatting erases the drive, so do it before you copy anything onto it.
3. Make a folder on the drive and point the tool at it
Plug the drive in and create a folder on it, for example Vimeo Archive. Then open the download tool in Chrome or Edge (Arc and Brave work too; Safari and Firefox don't yet), sign in, and paste your Vimeo access token. When it asks where to save, pick the folder you just made.
4. Choose the videos and the quality
Select everything (set the page size to All, then tick the select-all box), or work through one Vimeo folder at a time. Leave quality on Original for an archive: it's the file you uploaded, not a compressed copy. Keep the option to preserve folders switched on, and each video lands in a subfolder named after its Vimeo folder, so the drive ends up organized the same way your library was.
Try it now
Try it on your own library
The first 10 videos or 3 GB are free, so you can check the drive and the format before copying everything.
5. While it runs
- The files come down through your browser, so keep the tab open and stop the computer from going to sleep.
- Don't unplug the drive mid-copy.
- A dropped connection reconnects and carries on where it stopped. If a video still fails, retry it: that file starts again, and failed attempts don't count against your pack.
- Videos you've already saved are marked, so you can stop and pick up the rest later without paying for them twice.
6. Check the copy
Compare the number of files on the drive with the number of videos you selected, then open a handful, including the longest ones, and scrub through them. It takes ten minutes and it's the only way to know the archive is good.
7. Don't stop at one drive
Drives fail, get dropped, and get lost. The usual rule for anything you can't replace is three copies, on two kinds of storage, with one somewhere else. A second drive kept at another address works, and so does a copy in the cloud: Vimeo to Google Drive uses the same pack, and videos you already paid for don't count again. More on this in our Vimeo backup guide.
Doing this because you're leaving Vimeo?
Then finish before your billing period ends. After that the account drops to the Free plan, newer videos become impossible to download, and bulk tools can't reach the library at all. Here's the full timeline.